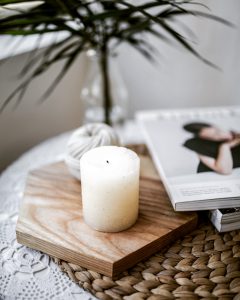
Fall is here, and scented candles are back on the mantle–unless you’re like me and burn them year-round. While they’re beautiful and fragrant, many candles run upwards of $25. Don’t feel like dropping the price of a nice dinner on decor? Why not try making candles at home?
It’s a relatively easy process that has been around for centuries. Chandlers were respected members of the community, providing cheap light for homes. If you wanted to continue working after the sun went down, you needed a candle. While we have lightbulbs now, candle making could still be the start of a good business.
So, we can continue this tradition and honor it this fall. Besides the cost drop, you’ll find this practice offers:
- Less waste
- Easy production
- Customizable artwork
- Home-craft time with friends and family
- Excellent gifts
- Bragging rights. You made them!
So, like any good recipe, the first thing you need is the materials. You can follow along with me as I start the project.
Ingredients to Make Candles
Wax
The largest portion of your ingredient list is the wax. There are three major wax types to choose from depending on your preference: beeswax, soy, or paraffin. By far the most popular is paraffin wax. It holds the top spot because it’s inexpensive and easily customizable. However, you may wish to use soy wax or beeswax because they are more natural. Paraffin comes as a petroleum product, and is, unfortunately, a little toxic. You should be safe unless you plan on eating the candle.
My choice for this project is beeswax. It comes in a pellet form so I can measure it easily, and the product will give my candles a desired look. Paraffin leaves them too perfect, whereas the beeswax will give them a soft, creamy feel.
Wicks
While not as large a portion, the wick is still an essential part of the candle. Take time to choose a good one for your candle’s diameter. A good rule is to choose a wick that will be a little taller than your candle so that you can trim it down. Some places sell wicks already attached to a base.
Personally, I’m refilling glass pillar candles. So, my wicks need to be at least a foot in height. Also, these come with bases, so I don’t need to spend the extra money buying this with a base. Purchasing a wick spool would not only be cheaper, but also better for custom wick heights.
Extras
These are the fun additives that make a candle much more than just a light source. Most candle supply sites know their audience, so they come stocked with fragrance oils and dyes specifically for wax. If you don’t see any you like, try searching online for wax-safe additives.
I chose lavender essential oil, but no coloring for my candles. I like having neutral colors for decor in my home.
Without further ado, the actual candle making process:
Recipe to Make Candles
Clean area/ Set up container
You can set newspaper down, just like any craft project. For the wax, prepare a double boiler to melt it in, placing a lot of water in the bottom part. A pound of wax is a good amount for two small mason jars. Tip: Wax is easier to clean if you freeze it. Place materials in the freezer afterward and let it harden, then just chip off.
Melt Wax
Place your wax in the pot and melt. Use a spatula to break up chunks for a smooth consistency, kind of like melting butter.
Prepare Wick
If you haven’t already, measure your wick to your container and cut it to size. Make sure to leave extra. You’ll want to adhere it to the container’s bottom. Tip: Superglue works in a pinch, but adhering your wick to the container’s bottom can be done with candlewax. Just touch the wick’s bottom to the melted wax, then press it to the container.
Add Extras
For me, this is the time to add the lavender oil. A good rule is 1 oz. of additive per pound of wax. Be sure to stir it so it gets mixed well.
Cool and Pour
You don’t want the wax super hot when you pour it in, so let it cool just a bit. (About 130 degrees) Save some wax in the pot.
Secure Wick and Cool
You don’t want the wick to be uncentered. So, secure it by tying it to a pen and setting it on top of the container. This is easier if you’re making it in a jar.
It’ll take a few hours for your candle to be cool and set. Often, a sinkhole appears around the wick, so that’s when you take the extra wax and fill it in. Make sure while you’re cleaning up to use paper towels or something similar. Do not put wax in your sink. You don’t want any wax lingering in your pipes or on the stove.
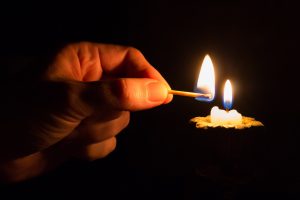
Afterward, you have your first, beautiful homemade candle! You can give it as a gift to make a new friend, or burn it yourself.